'Tis the season... with a late Thanksgiving this year the holidays are truly just around the corner. This week's Tech Bytes has several ideas and activities for you to enjoy and get a jump start on getting ready since we only have 2 weeks before many of us are on holiday break. Don't forget, this week is 💻 Computer Science Education Week! Be sure to take a peek at last week's Tech Bytes for Hour of Code resources!
I had a blast over the past couple of weeks helping the first graders with their special SNOWpinion writing pieces. After talking with the first grade teachers, it was decided that we would have students type their pieces on a collaborative Google Slides document in order to get some authentic keyboarding practice while also exposing them to working on a collaborative document. This was the first time these kiddos have experienced working on a collaborative document and with a little careful planning, and a pinch of patience, everything went off without a hitch. Having an index slide definitely made this endeavor super easy.
Headache Saver: Make sure that all of your students are on their slide and that the cursor is blinking on the frame they're going to write on. We had a few deleted slides and kiddos working on others' slides in one class as they didn't click on their frame before starting.
After everyone finished their writing, we saved the file as a PDF and then printed off the file so each student could display their writing in the hallway along with a snowman art project they had created.
During our planning time, the teachers also shared that one of their objectives was to have students present their pieces as they wanted to focus on presentation skills such as voice volume, clarity, and speed. After some discussion, we decided that we would have students use DoInk's Green Screen app to share their piece to add an element of authenticity and fun. Students choose the background they wanted and then bundled themselves up to create their SNOWpinion presentations. The end results were adorable and the students did a fantastic job practicing and preparing for their speeches. As students finished, they uploaded their SNOWpinion to Seesaw where they were able to share it with their peers as well as their parents. Green Screen Tip: Have all of your background images saved to one iPad so you're ready to go. We did all of our videos "live" right in DoInk with the background image already inserted. As you finish each recording save it to the camera roll for ease of uploading it to Seesaw, YouTube, etc later on.
Add-on Alert: After all of the students' were finished, I imported their DoInk movies into iMovie. (This was super easy to do because all of the videos were on one iPad!) I added a title frame from our shared Google slide deck and some background music and then shared the finished movie with the teachers for them to share with their students as well as parents via Seesaw. We also talked about how this video could be used at conference time by having it playing on an iPad on a continuous loop outside of their classrooms for parents to enjoy while they are waiting for their child's conference. Here's what the finished video looked like:
As part of our Core Ready Literacy program, 3rd graders read and create a book recommendation. Last year we used DoInk's Green Screen app and I helped the classes by doing the recording and then students uploaded their finished recommendations to Seesaw for parents to see. It's wonderful to have parents see what their children are doing at school, but I wanted students to have a more authentic audience and more creative ownership of their work so this year, I asked the teachers and their students if they would be willing to take it one step further. Here's what we did:
Disregard our rubber banded stand- LOL
It's called ingenuity when your iPad stand
doesn't acomodate a teacher's iPad mini.
First, students read their books and wrote their book reviews. Next, they grabbed a colored piece of 12x18 piece of construction paper (not green) and laid their book off to one side or the other and took a picture. This became the background for their video. Last year, we simply propped the books on a chair, but found that it wasn't as polished looking when we dropped those pics into green screen, plus the kids now get to choose their favorite color (it's a small thing, but sometimes, it's the little things that mean a lot). We had all of the kids take their pictures on the same iPad just to keep things moving along more smoothly for the next step. Our next step was to record the book recommendations using DoInk. This year I wanted the students to record the videos for each other so I worked with a few students at a time to show them how to import their background image, how to reposition the person speaking to fit on the background, and how to save the recording when they were done. After working with a few students they then became the teachers for the next group. Empowering kids to be the teachers is always a positive in my opinion and the pride they had in being their own videographers was priceless!
The best part... Once students uploaded their recommendation to Seesaw, I went onto Seesaw, copied the QR code to their post, and then pasted it onto a Keynote template along with the book's title. These QR codes and their book are now displayed around our library for other students to scan. My hope is that their book recommendations will truly be a recommendation and that it will also encourage other students to want to create a book recommendations throughout the year so we can keep the buzz about books ongoing.
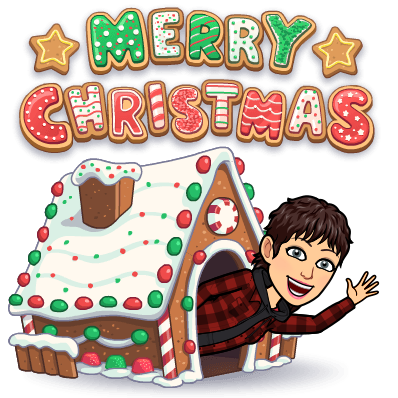
Hard to believe that Christmas has come and gone yet again, so the timeliness of this post may seem out of sorts, but the idea behind these cards will be a great tool to add to your green screen bag of tricks.
It all started on a cold, snowy Wisconsin morning with a Twitter message from my friend Bobbi Hopkins in NewYork wondering how to add multiple students to an image using DoInk's green screen app. Bobbi and I began to message back and forth with how it could be done as neither of us had previously tackled this endeavor. The magic that happened from this collaborative effort was amazing!
From this...
to THIS!
Ms. K's 1st grade
Here's how to create the magic yourself-
1. Select a background image that you want to use and add it to the bottom tray in the DoInk app.
2. Touch the + sign on the middle tray and choose the camera option to add a picture of student on the image.
When you touch the middle tray, you will notice it is bordered in red. When it is red, you can move the student wherever you would like on the image and also increase or decrease their size by pinching or zooming their image on the screen.
3. Switch from Video to Image (see below) and take a picture. Add this picture to your camera roll.
4. Touch the + button on the bottom tray and choose image. Bring in the picture you just took as your new background image.
5. Touch the cameras on the middle tray which will activate your camera again. 6. Have your next student stand in front of the green screen and position them on your picture. Take a picture and add it to your camera roll. 7. Repeat steps 4 through 6 until you have all students in the picture.
** To have a student be a tree topper or pop out of the chimney~ wrap them in green fabric from the neck down. ** Want a student to appear as though they are flying? Lay green fabric over a chair or table and have the student lay on their belly with their arms out.
Mrs. McMahon's 1st grade
We had a blast creating these cards and the kids had some great ideas like:
licking the lollipop, pretending to build the snowman, and


 During our planning time, the teachers also shared that one of their objectives was to have students present their pieces as they wanted to focus on presentation skills such as voice volume, clarity, and speed. After some discussion, we decided that we would have students use DoInk's Green Screen app to share their piece to add an element of authenticity and fun. Students choose the background they wanted and then bundled themselves up to create their SNOWpinion presentations. The end results were adorable and the students did a fantastic job practicing and preparing for their speeches. As students finished, they uploaded their SNOWpinion to Seesaw where they were able to share it with their peers as well as their parents.


 6. Have your next student stand in front of the green screen and position them on your picture. Take a picture and add it to your camera roll.


