Click image above to view larger format with clickable links
Showing posts with label Christmas. Show all posts
Sunday, December 5, 2021
Sunday, November 15, 2020
Sunday, December 15, 2019
π©π»π»Malchow's Tech Bytes~ Dec 16th π π»π
Here's hoping everyone has a wonderful and relaxing break! To those that celebrate, have a very Merry Christmas!
No Tech Bytes next week~ See you in January!
![]() |
| Click image above to access clickable links |

Sunday, December 8, 2019
Malchow's Tech Bytesπ©π»π»~ December 9th π π»ππ¦
'Tis the season... with a late Thanksgiving this year the holidays are truly just around the corner. This week's Tech Bytes has several ideas and activities for you to enjoy and get a jump start on getting ready since we only have 2 weeks before many of us are on holiday break.
Don't forget, this week is π» Computer Science Education Week! Be sure to take a peek at last week's Tech Bytes for Hour of Code resources!

Don't forget, this week is π» Computer Science Education Week! Be sure to take a peek at last week's Tech Bytes for Hour of Code resources!
![]() |
| Click image above to access the hyperlinks |

Saturday, December 15, 2018
Monday, December 10, 2018
Sunday, November 4, 2018
Wednesday, January 10, 2018
Christmas Cards the Green Screen Way
Hard to believe that Christmas has come and gone yet again, so the timeliness of this post may seem out of sorts, but the idea behind these cards will be a great tool to add to your green screen bag of tricks.
It all started on a cold, snowy Wisconsin morning with a Twitter message from my friend Bobbi Hopkins in NewYork wondering how to add multiple students to an image using DoInk's green screen app. Bobbi and I began to message back and forth with how it could be done as neither of us had previously tackled this endeavor. The magic that happened from this collaborative effort was amazing!
From this...
to THIS!
| Ms. K's 1st grade |
Here's how to create the magic yourself-
1. Select a background image that you want to use and add it to the bottom tray in the DoInk app.
2. Touch the + sign on the middle tray and choose the camera option to add a picture of student on the image.
- When you touch the middle tray, you will notice it is bordered in red. When it is red, you can move the student wherever you would like on the image and also increase or decrease their size by pinching or zooming their image on the screen.
5. Touch the cameras on the middle tray which will activate your camera again.
7. Repeat steps 4 through 6 until you have all students in the picture.
** Want a student to appear as though they are flying? Lay green fabric over a chair or table and have the student lay on their belly with their arms out.
| Mrs. McMahon's 1st grade |
We had a blast creating these cards and the kids had some great ideas like:
licking the lollipop, pretending to build the snowman, and
welcoming others to the gingerbread house.
Sunday, December 17, 2017
Tuesday, December 23, 2014
Ho, Ho, Ho...shhhh... it's parent Christmas gifts
We made these adorable little reindeer ornaments for our parents today. They were so easy and inexpensive. This is the 2nd year that I've made them with a few new modifications this year.

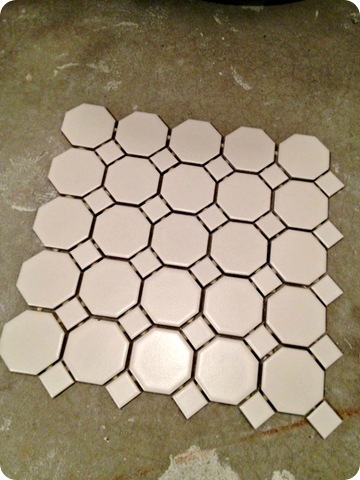
To start, I bought a sheet of white hexagon shaped floor tiles from Home Depot. I think the whole sheet cost all of $3.00 if I remember correctly (I bought this sheet last year and had enough left over for this year's class) There were 36 little hexagon tiles on a sheet. I started by cutting apart the sheet and then separated the hexagons and the squares. I'm not sure what I'll do with the squares, but they were too cute to throw away... maybe good for sorting/counting activities?? They'll likely see the garbage during spring cleaning if they're still in the cupboard without a use this year.
After separating, I used a scissors to quickly cut off the excess adhesive that originally held them together. Next, I had my kiddos come up 1 at a time to do their thumbprint. I had them write their names on the back of the tile along with the year with a Sharpie before we started. I wanted the kiddos to do it so moms and dads have a handwriting remembrance. I then used a foam brush to quickly paint an even layer of paint on their thumb and then they pressed it onto the tile. We used acrylic paint that I picked up from Wal-mart. The color was Burnt Umber and cost a whopping 89 cents. This little bottle will last you umpteen years! I did all of my class in about 10 minutes (fingerprints only at this time) We let them dry over the lunch hour, but to be honest, they are dry enough within 15-30 minutes for the next step if you don't make the prints too thick. You can see the difference between a one which is a bit thick and one that I consider just right to the left. I like it when you can see the swirls of the fingerprint a bit so parent know it's a print.
After letting the paint dry, I call kiddos to my kidney table 3 at a time for the next step. This step turns the ordinary fingerprint into an adorable reindeer ornament with a Sharpie marker, some white paint and a little bit of puffy paint. As the kids come back they use a brown Sharpie marker (I bought 3 last year at Home Depot at Christmas time when you could buy individual colors.I think they were about $1.50 each) to draw on the antlers. We do this first so they won't smudge the paint we are about to put on. Once their antlers are done I have them dip the end of a different Sharpie marker into some white acrylic paint (yup, another bottle from Wal-mart) and dab it onto their print where they want their eyes to be. I model this for them so they don't over dip and they do a fantastic job. Next, they use black puffy paint to squirt 2 dots on the white for the pupils and then squeeze some red puffy paint onto the bottom of their print for a Rudolph nose. I honestly can't tell you how much the black and red puffy paint costs as I bought it for other projects many years ago... but that being said, once you buy, you won't likely need to buy more again for MANY years with just a dob here and a dob there.
We then let them sit overnight to completely dry and set up.
The next day I hot glue on a loop of cute sparkly silver ribbon that they can hang their ornament from the tree from. I always buy my ribbon after the holiday to get it 50% or more off. Each spool usually lasts me 2-3 years depending on how many kiddos I have and I big I make the loops. (I usually have about 18 kiddos in my class) and viola- you have a cute, inexpensive ornament that is a personalized remembrance for parents. I use to do the handprint snowmen ornaments but they started to get expensive and messy to do. THese are so much easier and more durable as well.
To start, I bought a sheet of white hexagon shaped floor tiles from Home Depot. I think the whole sheet cost all of $3.00 if I remember correctly (I bought this sheet last year and had enough left over for this year's class) There were 36 little hexagon tiles on a sheet. I started by cutting apart the sheet and then separated the hexagons and the squares. I'm not sure what I'll do with the squares, but they were too cute to throw away... maybe good for sorting/counting activities?? They'll likely see the garbage during spring cleaning if they're still in the cupboard without a use this year.
After separating, I used a scissors to quickly cut off the excess adhesive that originally held them together. Next, I had my kiddos come up 1 at a time to do their thumbprint. I had them write their names on the back of the tile along with the year with a Sharpie before we started. I wanted the kiddos to do it so moms and dads have a handwriting remembrance. I then used a foam brush to quickly paint an even layer of paint on their thumb and then they pressed it onto the tile. We used acrylic paint that I picked up from Wal-mart. The color was Burnt Umber and cost a whopping 89 cents. This little bottle will last you umpteen years! I did all of my class in about 10 minutes (fingerprints only at this time) We let them dry over the lunch hour, but to be honest, they are dry enough within 15-30 minutes for the next step if you don't make the prints too thick. You can see the difference between a one which is a bit thick and one that I consider just right to the left. I like it when you can see the swirls of the fingerprint a bit so parent know it's a print.
| A 15 point buck! |
We then let them sit overnight to completely dry and set up.
The next day I hot glue on a loop of cute sparkly silver ribbon that they can hang their ornament from the tree from. I always buy my ribbon after the holiday to get it 50% or more off. Each spool usually lasts me 2-3 years depending on how many kiddos I have and I big I make the loops. (I usually have about 18 kiddos in my class) and viola- you have a cute, inexpensive ornament that is a personalized remembrance for parents. I use to do the handprint snowmen ornaments but they started to get expensive and messy to do. THese are so much easier and more durable as well.
Wednesday, January 1, 2014
Ugly Holiday Sweaters
Right before the holiday, our staff had an Ugly Christmas Sweater contest. The kids thought it was quite a hoot. After the staff day, I decided it would be fun to do our own Tech'd-out Ugly Sweater Day after stumbling across the Ugly Sweater writing prompt on Technology Tailgate. This couldn't have been more timely as we are currently working on opinion writing.
I started by downloading the free, Ugly Holiday Sweaters app. This is an iPhone app so if you are downloading on iPads you will need to toggle over to the iPhone app area. Be careful to get the right app as there is another free ugly sweater iPad app which has some inappropriate content for your classroom. This app has 10 different sweaters for kiddos to choose from- just enough to give them choice but not take too long to decide.
Once kiddos decided on their sweater, we used the app to take a pic. Here is one of my kiddos in his sweater. At this point, students needed to tell 3 reasons why their holiday sweater was the ugliest. They had some really clever ideas including one of my little guys stating that his sweater was "just too Christmas-y!"
We chose to print our pics off from the app and attach them to our writing so we could display them in the hall for all to enjoy. We've had lots of comments and giggles on our writing. This will be a definite re-do next year!
Sunday, December 16, 2012
Timmy, our classroom elf
2 weeks ago a package arrived straight from the North Pole with a book called, The Elf on the Shelf and a small, cute elf who we have now affectionately named Timmy. As we read the story we found out that our elf will be reporting back to Santa each and every night and that the next day he will be in a different location in our room. We also found out that once Christmas arrives, that our elf will return to the North Pole until next year. For that reason, we decided that we'd better document Timmy's adventures while we had the chance so... each morning when the kiddos come in, they immediately begin to scour the room for Timmy. Once they find him they get their iPad out and take a picture of him.
Now that we have our email accounts sync'd to our iPads I usually write my kiddos a morning message similar to the one below. Each morning there is some sort of technology task to do such as replying to a question, taking a picture, or attaching a picture to an email. This has been a great way for my kids to practice their technology skills in an authentic way while also improving their reading and writing abilities.
Looking ahead at the big picture, my rationale for having them take a picture each day is that at the end of this "elfie" journey, we will document Timmy's adventures in our classroom by each uploading our pics into the app iMovie. It's my hope to then share our projects on our classroom blog and/or have each child send their project via email to their parents. I had thought about using PicCollage again but opted against it with the number of pictures that we will have and thought that the slideshow format would be better suited.
Subscribe to:
Posts (Atom)